Watercolor Blooms
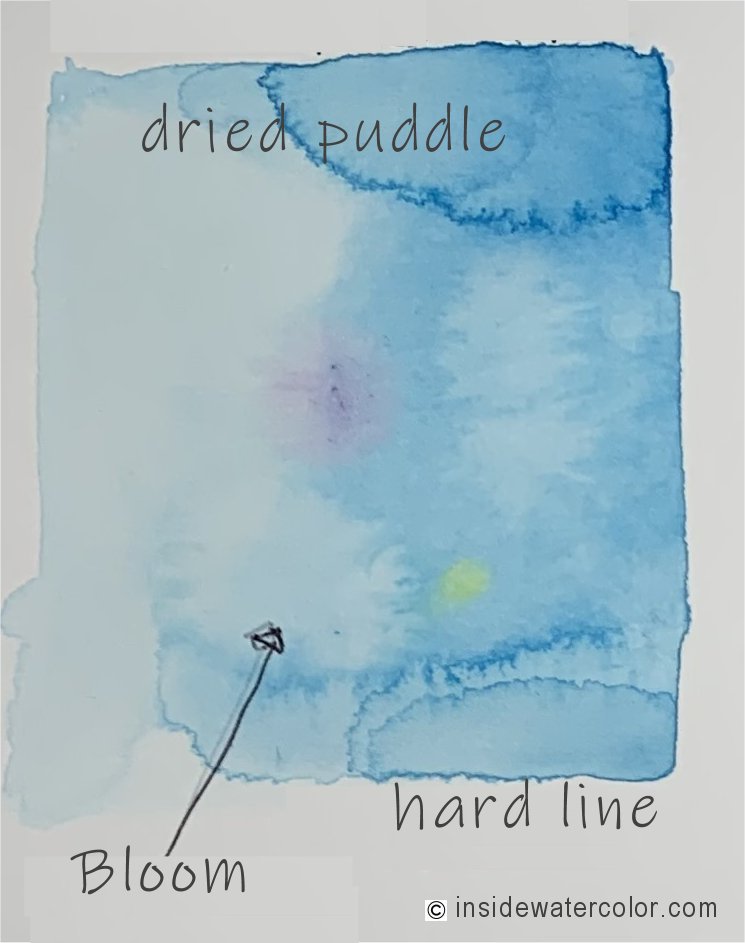
Watercolor blooms sound like a flower technique, but no, they are an unexpected event when more water and paint are added to an area on the paper that has already been painted. The extra water causes the original and new paint to get pushed out to the edges of the wet paper area.
Blooms are the result of impatience and a habit of trying to fix a painting when you shouldn't. My bad habit is that once I paint a flat wash of color, I try to then “fix” areas that don’t look right. This is especially bad to do while the paper and paint are still wet. I add more paint and water, but instead of fixing the issue, it creates a big bloom that ruins the flat wash completely. Argh.
Blooms are also called backruns and better artists than me use them on purpose to make interesting cloud shapes or give the edges of a flower petal or leaf a sharp color delineation.
How to Create Watercolor Blooms
- Mix up your several colors. Using a flat brush, lay down a flat wash of one color over the paper.
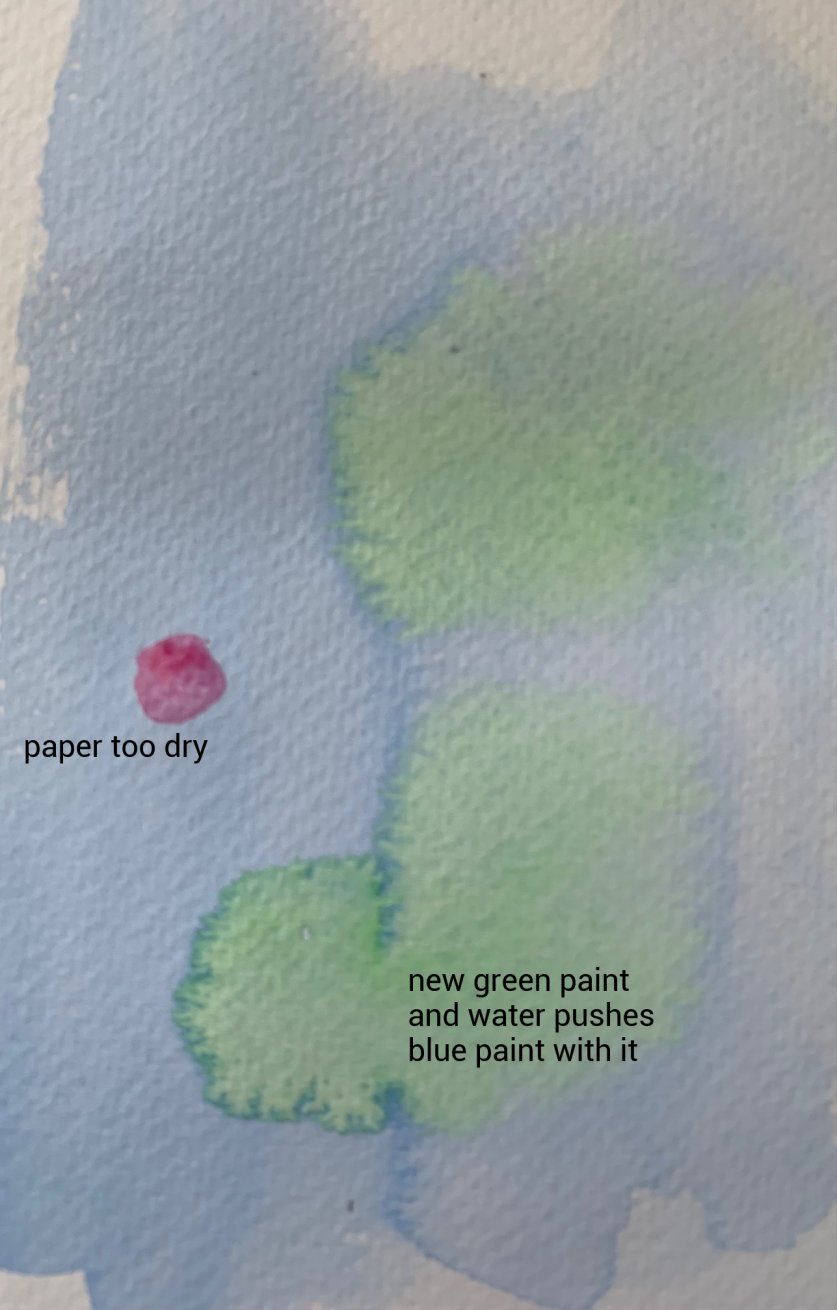
- Now add more water to the second color and mix. Then load up the brush with this new paint and water and let it drop into the flat wash area.
- As the new water and paint are introduced, it will push the paint already there along with it to the edges of the new water puddle.
- This will continue to spread as long as the paint and paper are wet. Voila, you now have a bloom.
- You can create a bloom by dropping in just clean water on a wet area as well.
Note that the pink area didn't bloom. The paper had already dried, so when I dropped in that color it just sat on the paper and didn't move.
So that's a short lesson on watercolor blooms. With practice, you can command these happy accidents into some cool effects in your paintings.
