Handmade Birthday Card: Sunset Road
 |
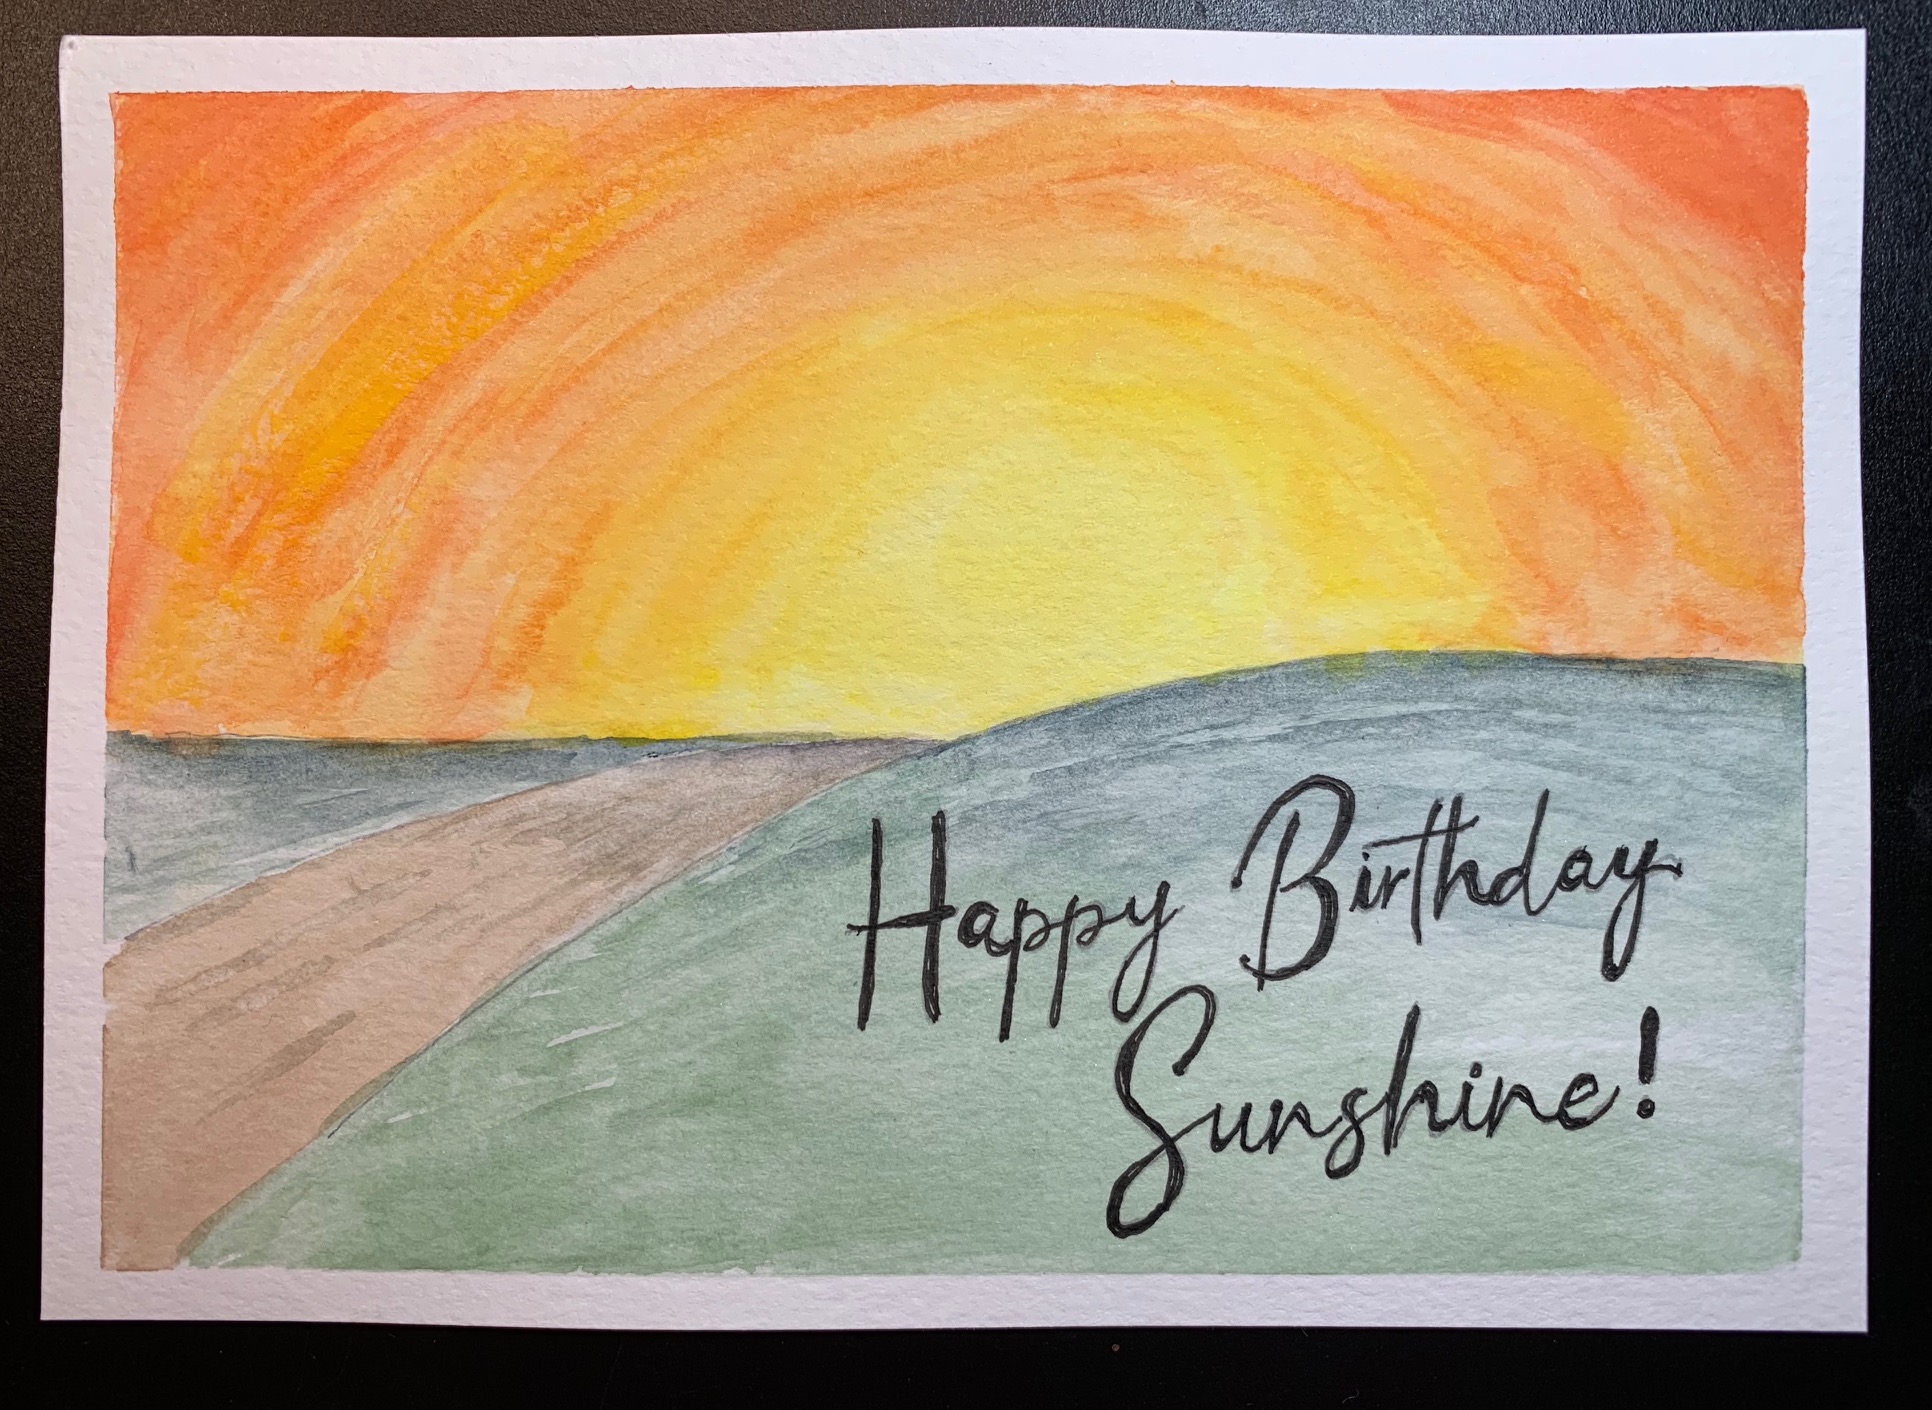 |
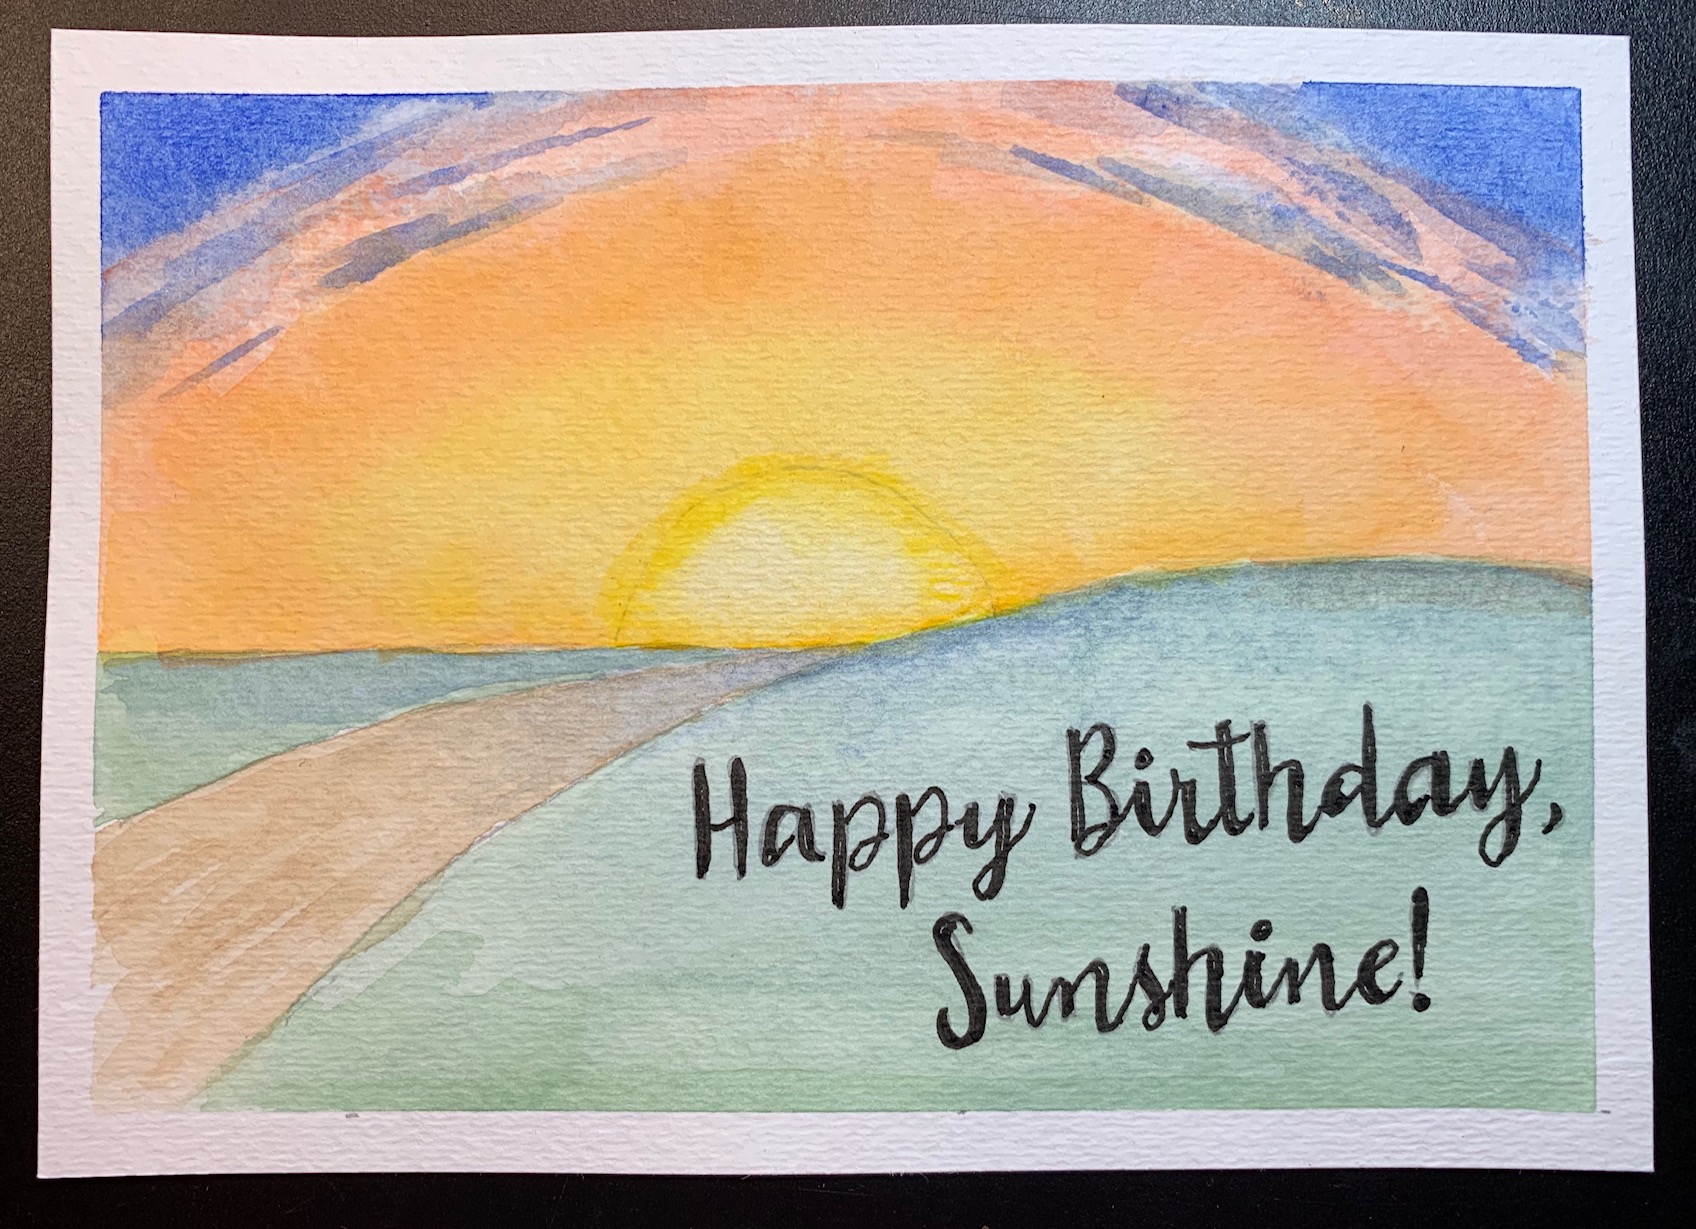
This simple, easy-to-do handmade birthday card kit includes several different designs in a 5x7 landscape orientation. The text is written over an easy-to-paint background drawing. Some of the designs include butterflies to add to the painting fun.
Supplies needed:
- Painters or masking tape
- Strathmore watercolor card, 5x7 size
- Sheet of watercolor paper for testing (optional)
- Pencil and kneaded eraser
- Graphite paper or a light table
- Watercolor paint or watercolor pencils (green, blue, yellow, orange, gray, various other colors for butterfly designs)
- Watercolor brushes: Small flat and a medium round with a point.
- Clean jar of water
- Permanent Sakura Micron or other similar brand of markers to draw
and darken lettering.
Steps to Complete this Handmade Birthday Card
Here are the general steps to make your own Sunrise-Road handmade birthday card. The complete detailed steps are in the downloadable tutorial file.
- Choose the design you like from the tutorial file and print out that page on your printer, making sure to set the page size to actual size.
- Using either graphite paper or a light trace device, trace the image onto the front of a 5”x7” watercolor card. Use a very light touch, especially for the sun and sun rays. The idea is to have a drawing to follow but not to make it so dark that it shows through the transparent watercolor paint. For cleaner results, don’t trace the sun at all and work from viewing the finished cards.
- If you choose a design with a butterfly, you may find it’s easier to paint the sunrise first and then add in the butterfly. Or you can just paint around it, or you can use masking fluid to protect the butterfly.
- Once you have drawn the image, pull off a penny sized piece of the kneaded eraser and roll it into a ball so you can dab and lighten the pencil marks to keep them from showing through the paint.
- Tape the drawn card down to a sturdy surface to minimize buckling when you paint. Make sure the tape is applied so that your unpainted borders will be straight and even when you are done.
- Paint or color the image in the stages discussed below. Use the finished examples included in this kit for inspiration. Or choose your own color palette. Note that the painting is to be done in stages, allowing drying time in between.
- Using the flat brush, paint the land first using a light wash of green. Once this is dry, use the round brush to add another light wash of blue over the part of the land closer to the sun. Quickly rinse and dab the water off your brush and then blend the wet blue wash into the rest of the green wash. This will result in a blue-green color and give the illusion that it’s fading into the distance. I used Ultramarine blue and Hooker’s green plus a little gray for the land.
- Paint the road with a light wash of an earth color or light gray. Let it dry and then paint a light wash of blue over the road where it gets closer to the sun. Quickly rinse and dab the water off your brush and then blend the wet blue wash into the rest of the road. This bluer wash will give the illusion of distance. Allow the entire card to dry before proceeding.
- Again, once the card is dry, use a warm yellow and orange for the sun, with yellow being the brighter color of the orb.
- There are several ways to paint the sun rays. You can do a light even wash of the yellow color first, and then add another thin layer of orange wash in a circle around the orb, fading it out to the edges of the tape. Or you can paint alternating rays of color, blending them into one another. You can even add blue sky at the edges of the sun rays and into the top corners of the card, if you prefer that. You get to choose.
- Allow the card to dry completely. Once it is dry, use the Micron markers and follow the pencil marks to draw in and darken the lettering. Use the fine 02 marker for the finer, smaller print, and the 08 marker for the thicker text.
- Allow the ink to dry completely, then use the kneaded eraser to remove any pencil marks left.
- Remove the tape
around the card. Voilà, you have a
finished handmade birthday card, ready to send!
And If you like the card you create, you can have copies made at Vistaprint! Click the logo below to check out this great company. I buy my business cards and postcards from Vistaprint and the service is great.
Resources
- Tracing using graphite paper: https://www.insidewatercolor.com/graphite-paper.html
- Choosing colors: https://www.insidewatercolor.com/mixing-colors.html
- Strathmore cards on Amazon: https://amzn.to/2YBSS2U
- Sakura Micron markers on Amazon: https://amzn.to/2W7Heem
- Kneaded erasers on Amazon: https://amzn.to/2A5OTBz
Hope you enjoy doing this handmade birthday card project! If you have any questions, send me a message from my contact page. I'll do my best to answer you asap.
